
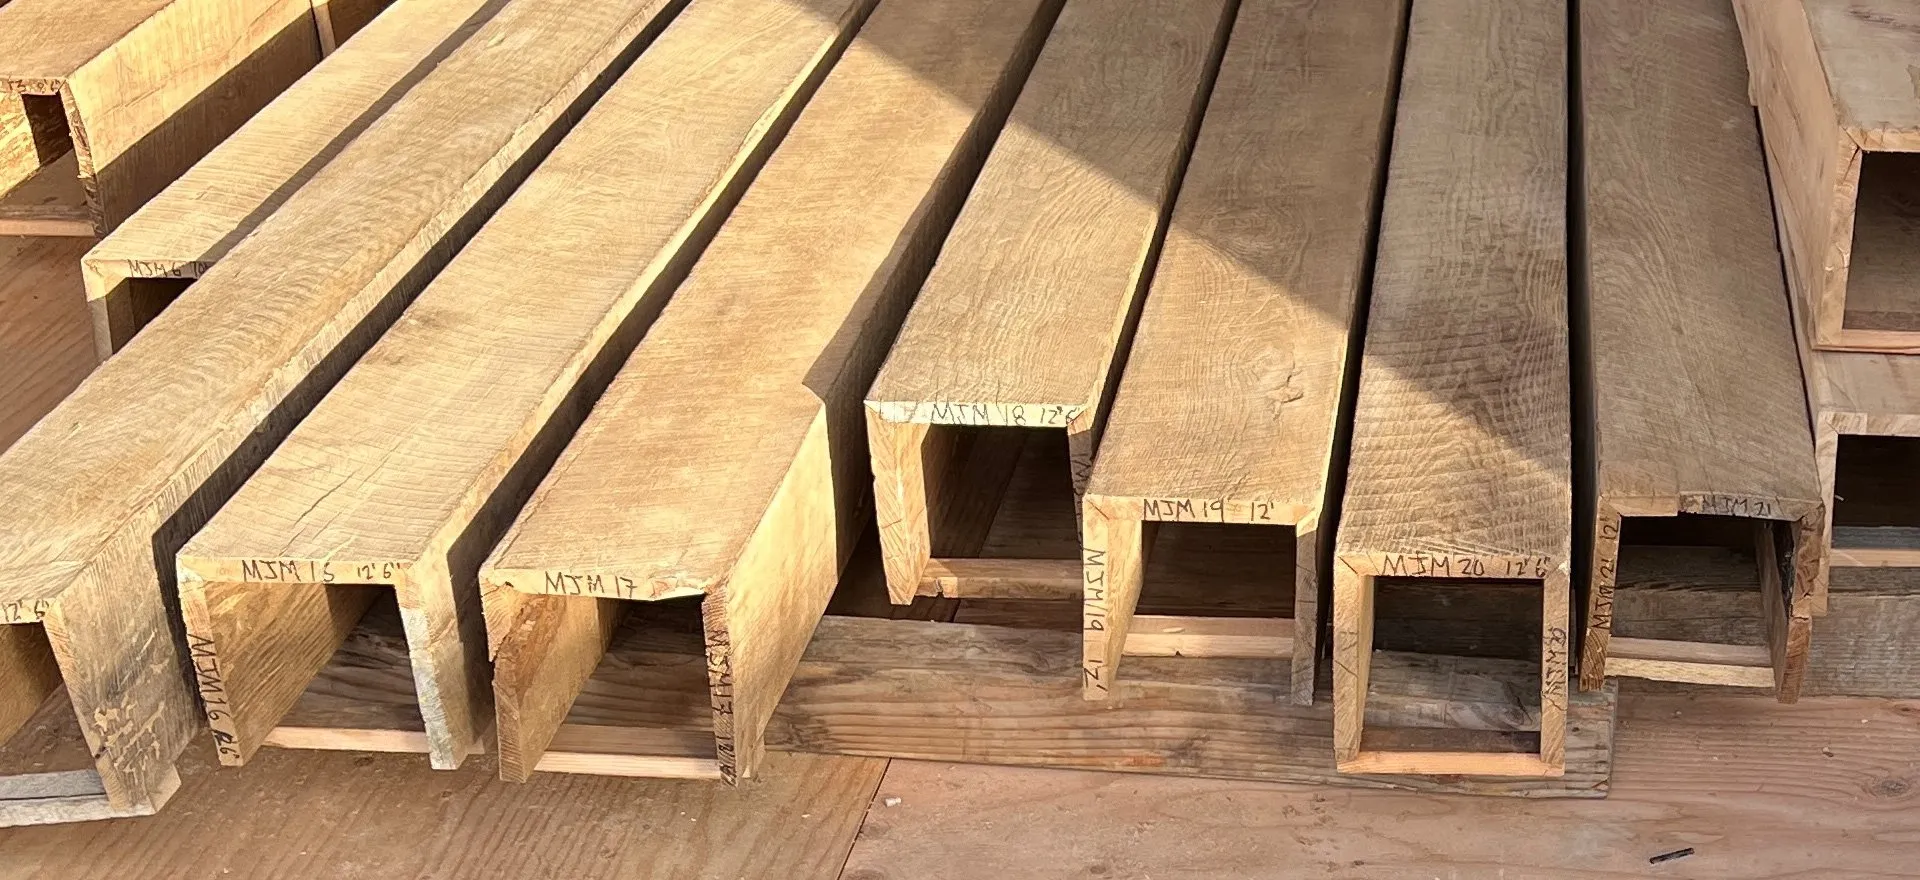
All Images Credit to E&K Vintage Wood
Bored of your current style and looking for a way to change up your space without the price tag of a complete and total remodel? Would you believe me when I say that you can have this one piece of installation put in that would completely change any room in your house and you can do it all yourself? It’s true! Faux wooden beams are one of the hottest trends right now and for good reason. You can style them in so many different ways. You can make them rustic, you can lean into the industrial aesthetic, or they can be sleek and modern. You can truly customize them to fit your own personal style and taste.
Faux beams can be quite pricey if you’re looking online. 8’ sections can go for as much as $325 a piece. Let’s say an average room is 12’x20’, it would be in the ballpark of $3500-$4000 just for the beams. If you have the money for it and you prefer the convenience of having them made for you, that might be something up your alley and you can certainly find ones with great craftsmanship. If you’re looking to save a little bit of money and don’t mind putting in a little bit of hard work, you can DIY them for a fraction of the price AND you can make them exactly as you’d like. Follow our step by step guide to totally transform your interior.
Here’s the materials you’ll need:
- 1-3 sizes of lumber for top (the base board), bottom, and sides
- these can be whatever size you want, however, we recommend 2×8 for the tops, 1×8 for the bottoms, and 1×6 or 1×8 for the sides
- Stud finder
- Painters tape (optional)
- Saw (to cut boards to proper length)
- Drill and long screws
- Clamps
- Nailgun and nails
- Hand sander (we highly recommend The Restorer)
- Nylon bristle brush or stainless steel wire wheel or brush
- 80-120 grit paper
- 220-240 grit paper
- Wood stain
Step 1: Planning and Mapping
First and foremost, you need to pick what size beams you want to have. We suggest at least using 1×8. If you want the sides of your beams to be a different size, we recommend using 1×8 for the tops and bottoms of the beams and 1×6 for the sides Next, you need to find and mark the studs in your ceiling–you’ll be attaching your base beams to these studs, so use them to help figure out your spacing (tip: use painters tape to help visualize and mark them).
Step 2: Create the Base
First you need to measure and cut your base beams to length depending on which way you want them facing. Depending on the length of the room, you may need to cut the boards into smaller, more manageable sections. For instance, if you need the beams to cover a length of 20’ you might be better off cutting your boards into 10’ or 5’ sections. It’s important to note that your base boards do not need to be sanded or treated. These will be covered up by our other boards and are just here for support purposes.
Next, you need to install your base beams along the length of your ceiling, screwing them into a stud every couple of feet. Your base beams are bearing the weight of the entire project, so they need to be firmly secured. DO NOT try attaching these to drywall without a stud, otherwise you’re risking everything falling off which can cause serious damage and harm. For extra security, use extra long screws, but at bare minimum these screws need to be long enough to go through the base board, dry wall, and the studs.
Step 3: Create your Faux Beams
This step will require you to combine 3 pieces of wood for each beam section. These will become our cover pieces–the bottom and sides of each faux beam. Working in sections, cut 3 pieces of unfinished beams to the length of the base board installed in the ceiling. If you’re using 2 different sized boards for your faux beams (see the notes above with the materials), you’ll need (1) 1×8 and (2) 1×6 pieces for each section in this step. Once cut to length, we’re going to use the ‘sandwich method’ to create our covers, essentially creating a “U” shape with the 3 boards. You can also use mitered edges, but we won’t be covering that here.
Lay a 1×8 beam flat on the ground and put the other 2 vertically along the sides of it so that it makes a “U.” Clamp your beam pieces together to make them tight and keep them from moving. Using a nail gun, attach the boards together along the edge about every 6” or so. Repeat this process for all sections.
Step 4: Adding Texture (optional)
If you want your beams to have a more rustic look, you can add some texture to them. If you want your beams to have a smoother finish, you can skip this step and go directly to the next one. To add texture, you’re going to need to use a stainless-steel wire brush or a nylon bristle brush depending on how much texture you want to add. If using the Restorer, you can use their nylon or stainless steel drums. They actually have a kit dedicated to live edge projects specifically, check it out here. The stainless steel is more aggressive and so will add more texture; the nylon brush is less aggressive and will create a milder texture.
Step 5: Prepping your Beams for Finishing
Once all your covers are put together, give them a rough sanding to prep for staining or painting. Depending on what type of wood you’re using, you’ll want to use an 80-120 grit to start off. We really love using the Restorer for projects like this because it’s so easy to use and cuts sanding time in half. If you happen to be using a Restorer, we recommend using their flap sandpaper drums–you can get those here. Once sanded, take a damp rag or paper towel and wipe your beams down to remove any dust and then you’re ready to start staining.
Step 6: Staining and Painting
Staining can be a painstaking, time consuming process, but it’s essential and will help everything come together. While sanding in between coats isn’t always needed, it does help it look smoother and helps give it a flawless, airbrush-like finish. In our opinion, it’s worth the extra effort! If you do choose to sand between coats, you’ll want to switch to a 240 grit. Again here, we’re going to go in with the flap sandpaper drum on our Restorer. The goal here is to lightly remove any imperfections, like bubbles, without removing any of the color we just put on.
Step 7: Putting it all Together
This part may require a little extra help. You’ll need 1-2 people to hold the covers up and another person to nail them into place. Take your fully finished cover pieces and fit them over the base boards you installed on the ceiling. Just as we did before when assembling the covers, place nails in the edges about every 6”. You can stop here if you’re satisfied with the overall look, or you can take it a step further and cover the seams or gaps that are visible with something like aluminum strips.
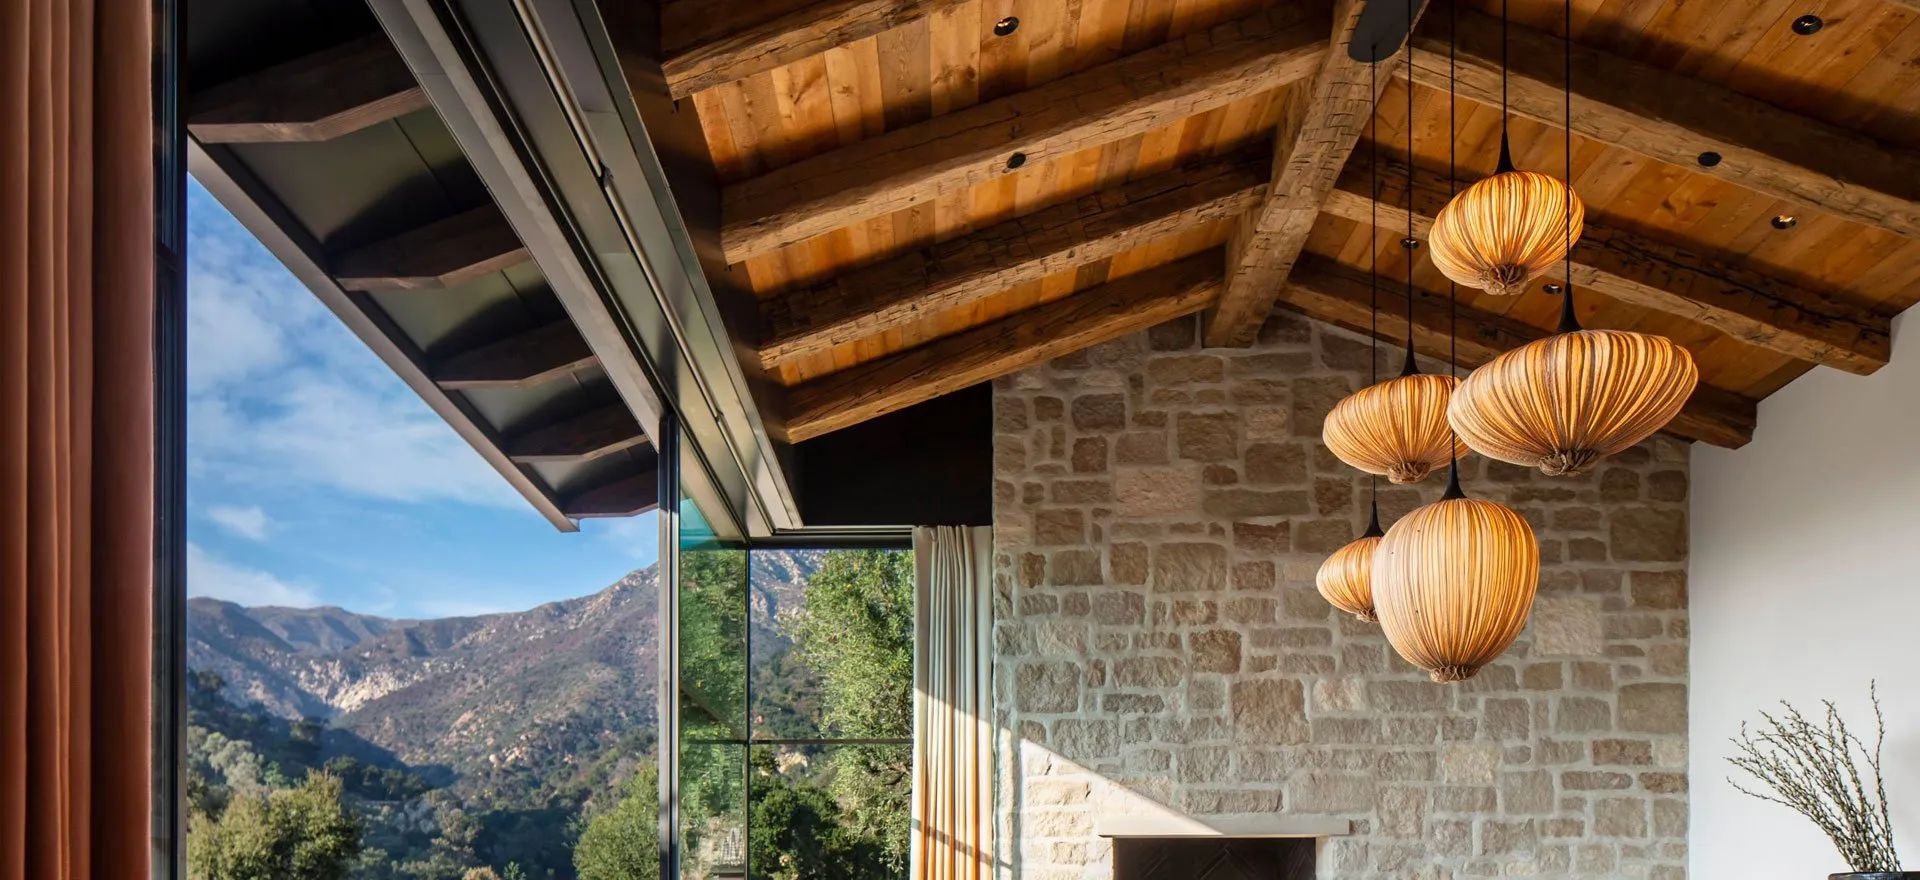
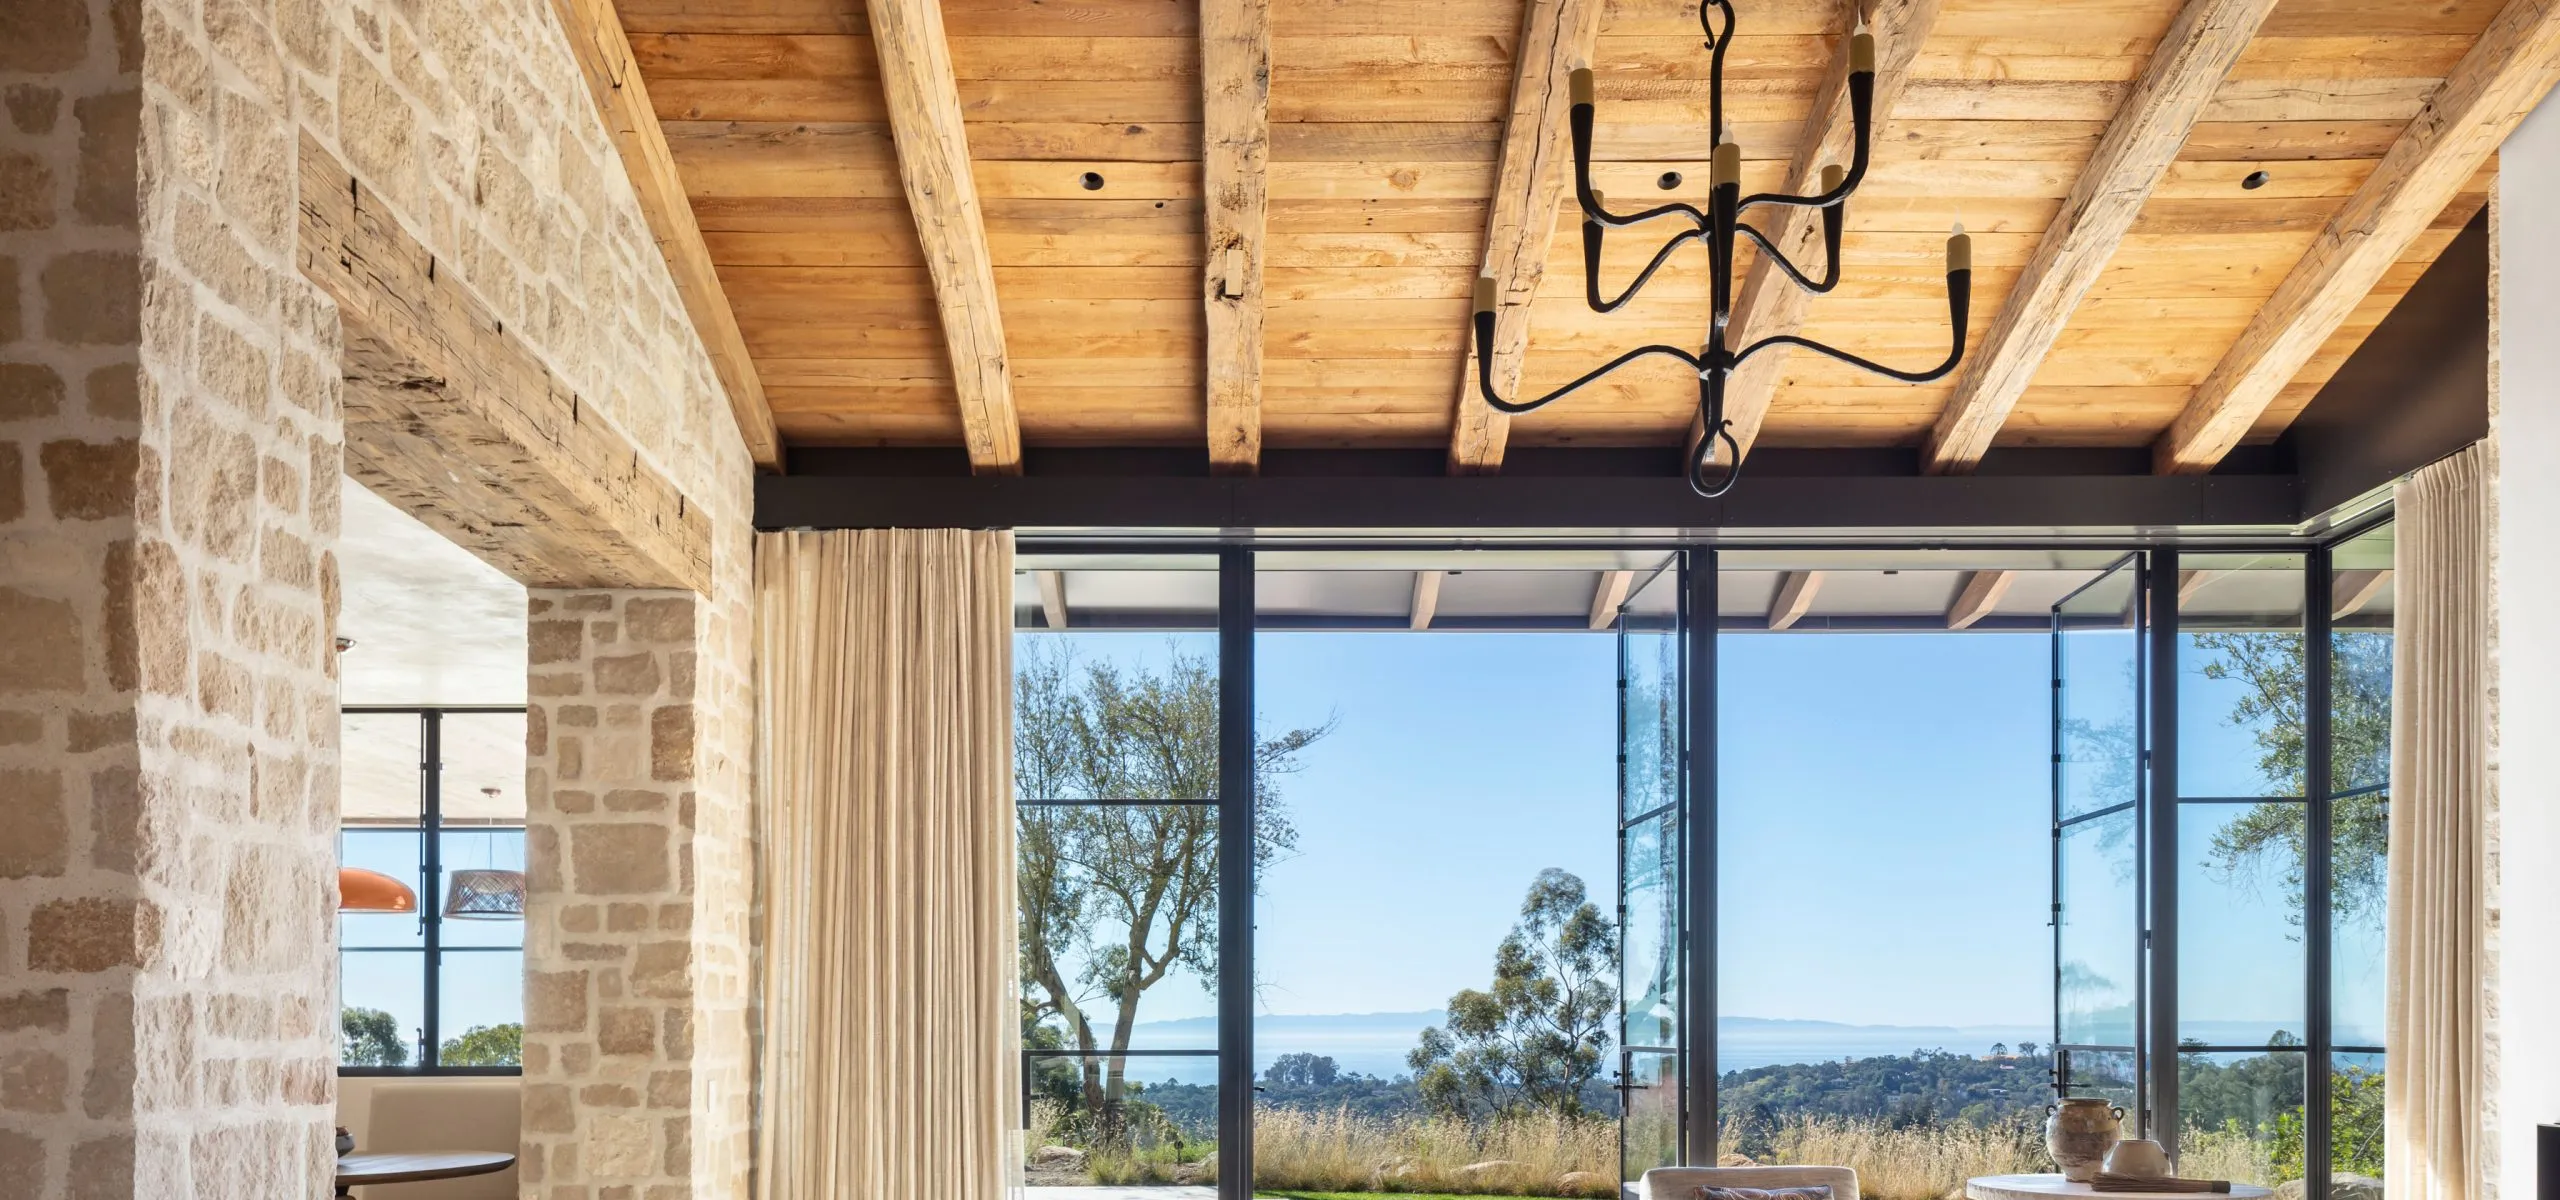
And that’s it! Not too bad, right? Take a step back and really just admire the hard work you just put into this. The faux beams really transform the whole room and make the ceiling feel taller. Follow us and stay up to date for our next project we tackle!
– C.R. Stredney – Entrepreneur and Blog Contributor
If you desire to purchase faux wood beams please feel free to reach out to E&K Vintage Wood at https://ekvintagewood.com/