
What is Live Edge Wood?
What is live edge wood? When a tree is cut down and cut into long sections or logs it is then inserted into a horizontal band saw or portable saw mill. It is then cut horizontally along the length of the log into 1.5″-3″ thick sections or strips. These sections, or slabs as they are called, are then stacked in the same order as they are cut but are now separated by spacers to allow air gaps between the slabs allowing them to dry out. They can also be inserted into a kiln to speed up the drying process before processing into furniture. Attached to the outside edges of these slabs is tree bark. Now this tree bark once removed will reveal the bare slab tree edge which is referred to in the industry as “live edge”. To clean up these edges and keep them as natural looking as possible follow the instructions below.
How To Finish Live Edge Wood?
We stopped using chisels and wire brushes 4 months ago to clean up our live edge slab wood. Why? It required too much time, left us with ugly edges, and took a toll on our hands, wrists, and elbows. After seeing so many people in the woodworking community ditching this outdated method and switching over to The Restorer, we finally got one for ourselves. With The Restorer, we’re now able to process exponentially more live edge in a much shorter amount of time, all while avoiding any aches and pains in our arms.
Live Edge Wood Tips
Hesitant to take my advice? No problem. I get it. Us woodworkers often have to make sure we spend our hard-earned money on the right tools. That often comes with reading a lot of reviews and making sure they come from people who are really in the game. Well, I can assure you we aren’t just deep—we’re neck deep. Hahaha! My name is Mark and—along with my wife—I own Siroh & Ivy (sirohandivy.com). We’re a Pittsburgh-based home decor creative that specializes in custom live-edge charcuterie boards, coasters, and tables. While we only started the business in late 2020, we’re experiencing high demand for our products. To give you an idea, we’re in a spot now where our newest goal is to make at least 150 charcuterie boards every two months—and that’s only one of our products. We’re getting accepted into bigger and bigger shows. We’re getting more custom table orders. We’re having to step outside of our comfort zone and learn so many new skills. With that, we’re having to process more wood than ever before, which means we’re constantly reviewing our methods and figuring out how to do things not just better but faster.
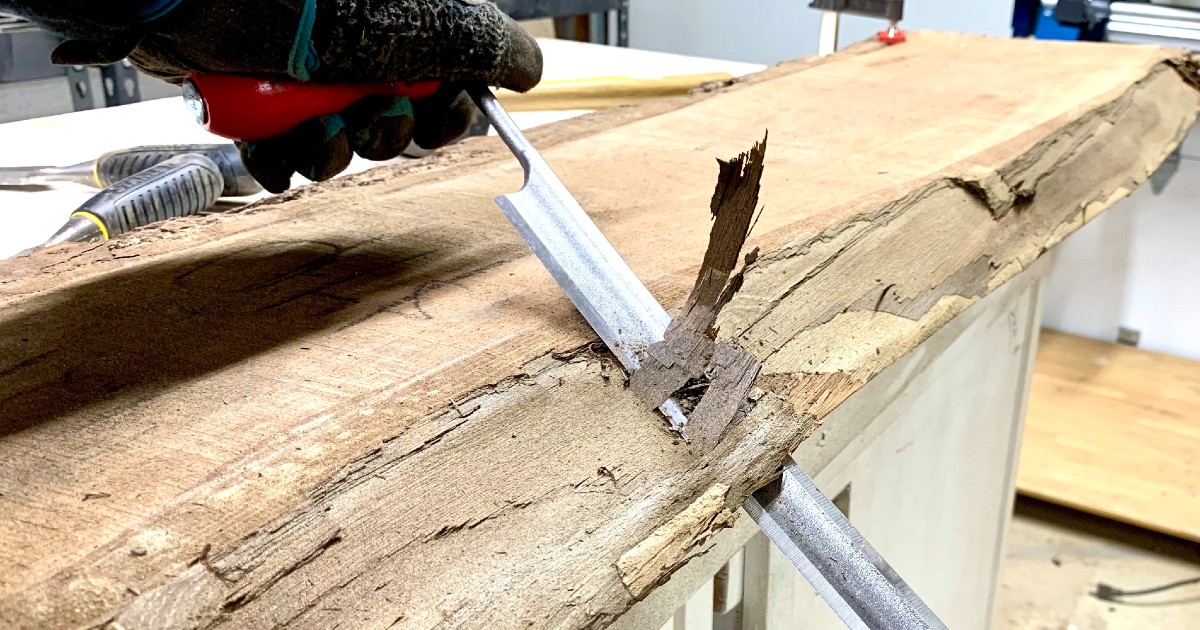
When we started working with live edge wood slab, we knew our style would not include leaving the bark on the wood, especially for items that needed to be food safe. We wanted that natural look without being too rustic. Being new to the woodworking profession, we turned to YouTube and found video after video of people using chisels and wire brushes to clean up their edges. They made it look relatively effortless, so we got ourselves some tools and then we got to work. We would take a series of chisels, use a mallet to wedge them in between the bark and the sap/ heartwood, and then strip the bark from the wood. We’d then go back with the chisel to scrape off the majority of the bark and cambium that remained. After that, we’d take a wire brush—by hand—and brush the rest of the live edge wood relatively clean.
What is a Natural Live Edge
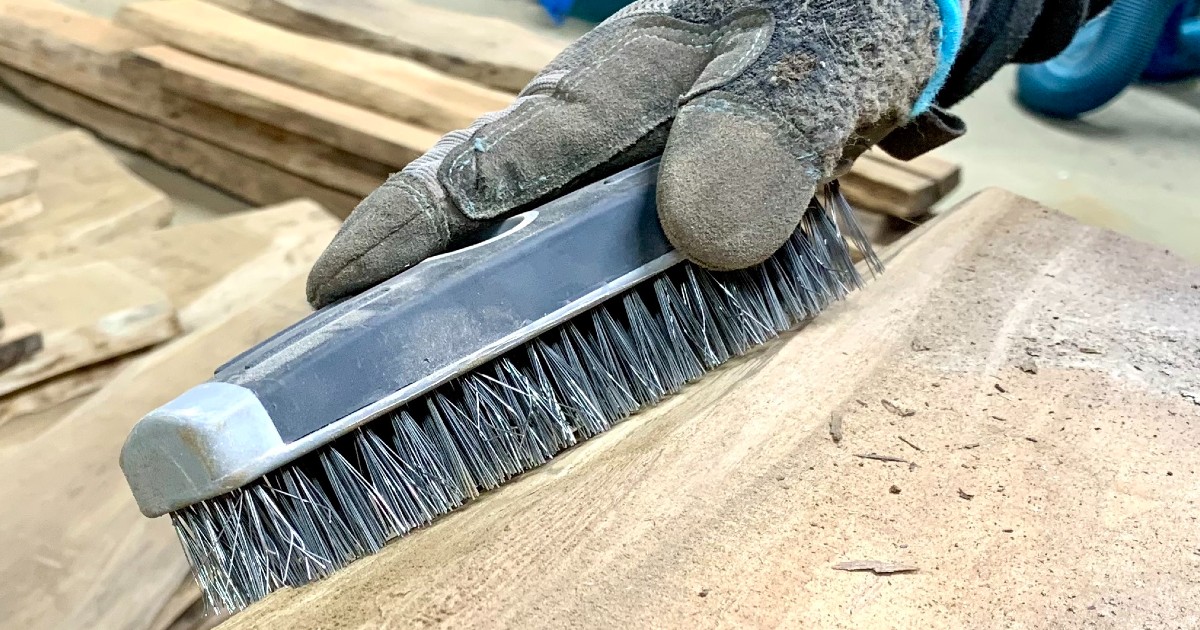
This process got old very quickly. Here are just some of the issues we ran into with this method: • The bark didn’t always come off as one intact piece. It often just crumbled or broke off into smaller pieces, especially when working with eastern cherry. Since chisels aren’t very wide, this resulted in a lot of mallet work to knock the majority of material off. Also, chisels could easily slip and fall. • When you did use a mallet to wedge the chisel between the bark and the wood, it would often cause the chisel to strike down too far and hard causing deep gouges in the wood. If you work with live edge wood, you know it can be difficult to determine just how thick the bark truly is. • Using a chisel to scrape the remaining bark and cambium from the edge was slow going, majorly tiring on the hand/wrist/elbow, and also left deep scratches/gouges. • Similarly, using a wire brush by hand was tiring and often ineffective. It just didn’t have the power and speed needed to remove the material. Plus, a larger wire brush just never did the trick when it came to cleaning up healovers, knots, and voids.
How to Finish Live Edge Wood | Bark Removal
Live Edge Slab Wood
Live Edge Wood
BUY LIVE EDGE RESTORER TOOL KIT
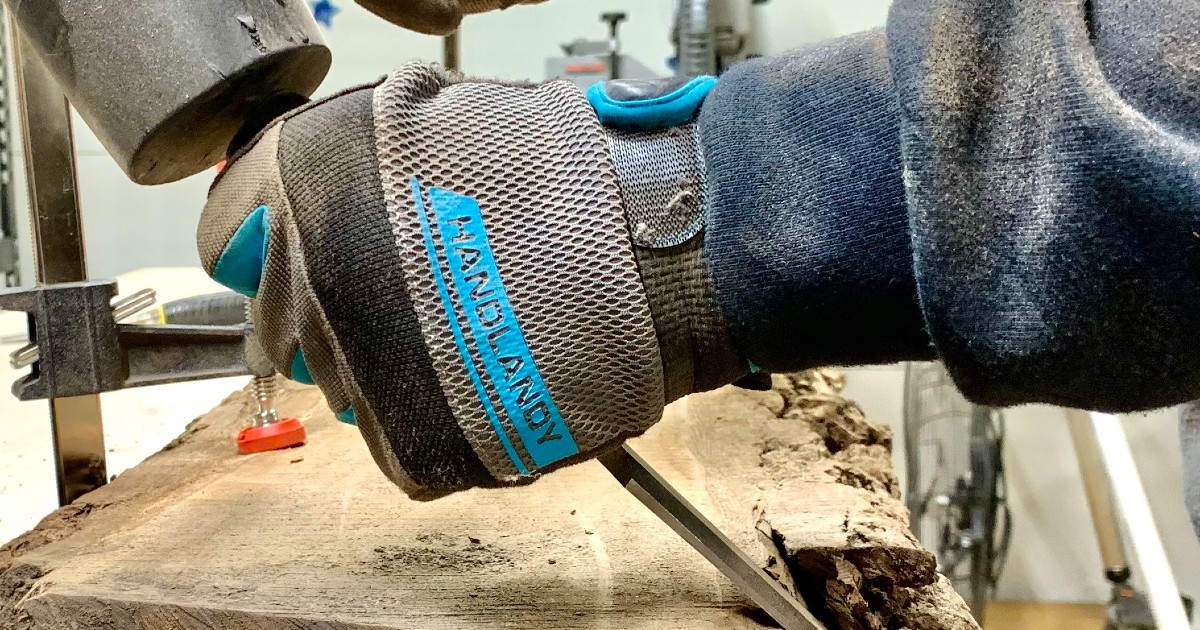
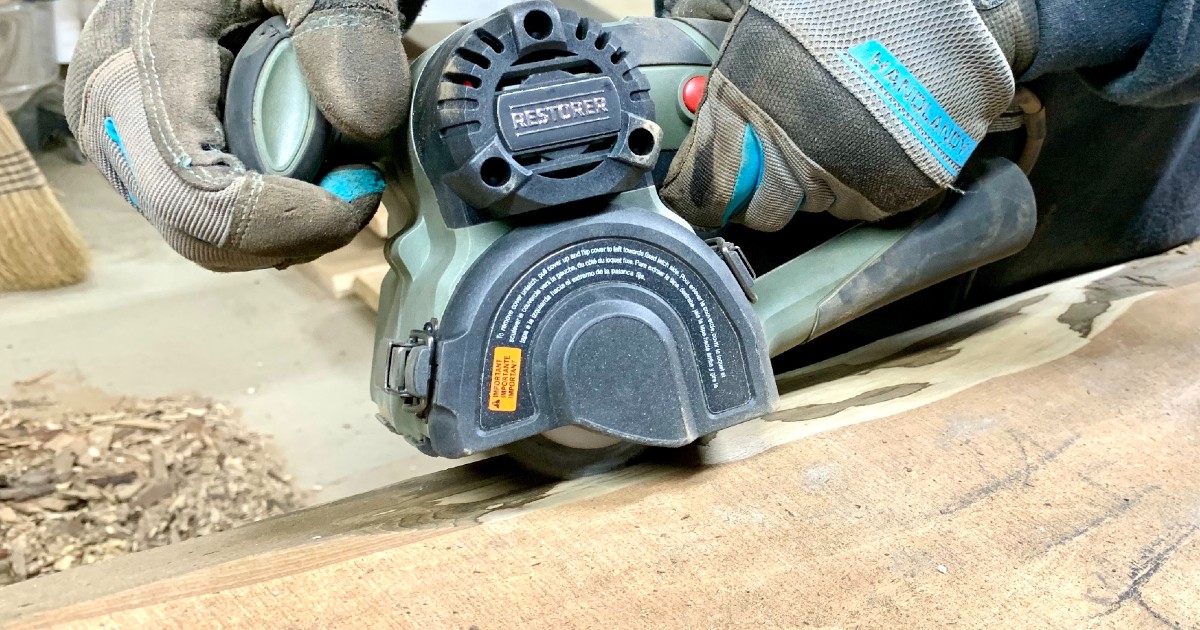
Despite my frustration with the chisel and wire brush method, I continued to use it for the entire first year of our business. It was something that—though I despised it—I understood and was comfortable with it. Then, I started seeing people using this really neat tool in their Instagram posts. They were holding what appeared to be a hand-held drum sander. Aside from the ergonomics of the tool, what stood out to me was the power. I watched this thing clear away dirt and grime from live edge wood like it was nothing. As my wife and I started setting new goals for Siroh & Ivy—including finally moving into live edge wood table building—we knew needed to process more wood than we ever had. It was going to take giving up my old ways for something newer and better. So, around Thanksgiving, we finally invested in The Restorer. Bye-bye hand-held wire brush limited by my own speed and power. Hello, The Restorer with your ergonomic grip and adjustable speed control. Also, bye-bye chisels! We ditched them and started using a drawknife. Now, once I clamp down my live edge wood to my workbench, I use my super sharp drawknife. I can use two hands and the power of my arms, back, and legs to pull the knife along the live edge, easily removing the majority of the bark. This thing just slices and wedges its way right through, leaving barely any marks. After the majority of the material is removed, I then grab my Restorer, equip it with an 80 grit nylon drum, set the power to max, lock the trigger, and easily run it along the entire length of the edge. I never stop being amazed at how this tool so quickly and easily removes all the remaining bark and cambium, smooths out drawknife marks, cleans up bumps/voids, and adds character to the edge. It’s seriously like a hot knife through butter.
What a Natural Live Edge Should Look Like
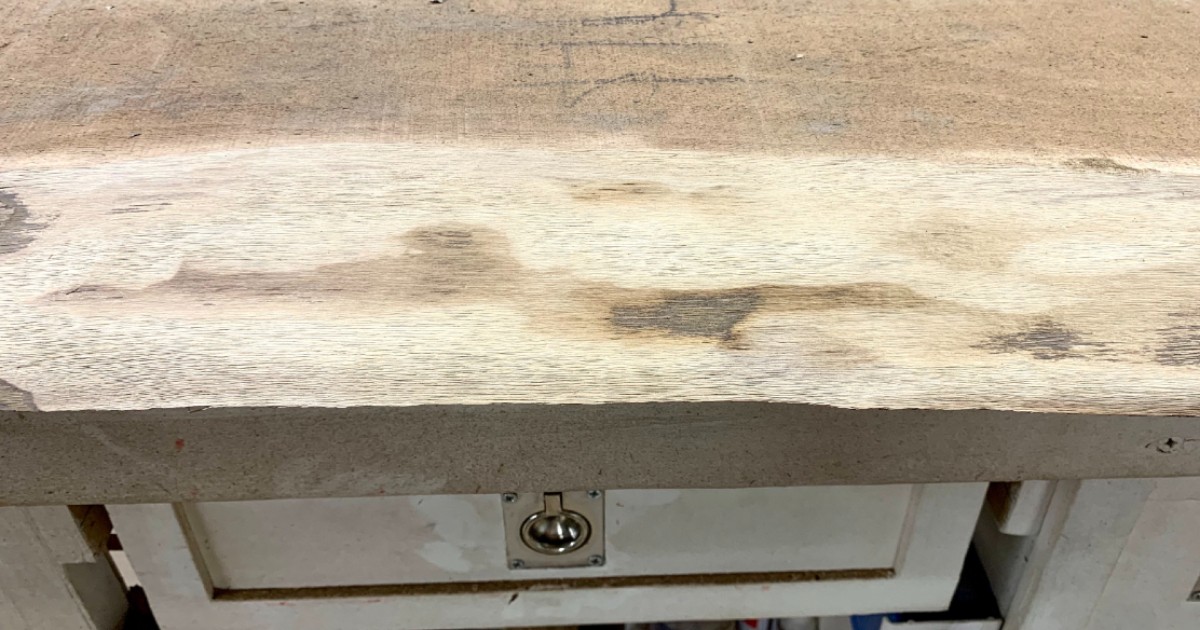
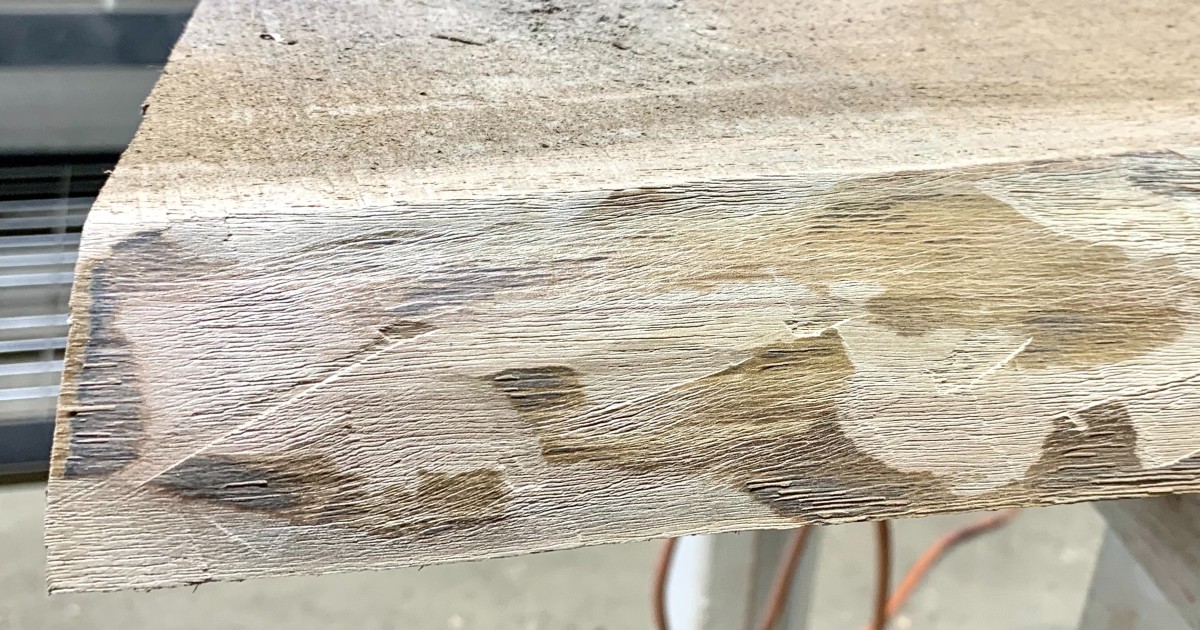
Just the other day, while prepping for an upcoming 3-day show, I was able to use The Restorer to clean up the live edges of 25 charcuterie slabs in under 4 hours. Not only did this allow me to move on to the rest of the processing faster, but I also had no pain or fatigue in my hands, wrists, and arms. I’m telling you, The Restorer has turned my least favorite part of milling into the part I love doing the most. By looking at my pictures, you can see the difference is in more than just the time and the physical demand. Because of the drawknife and The Restorer, my live edge is cleaner, retains more of the natural shape, and is pretty much free of tool marks, which makes sanding much easier later. With The Restorer in my arsenal of tools, I’m much more confident and capable of meeting the demands of our customers. I don’t think I could process live edge wood in any other way again.
Restorer Customer Service Review
Before closing up the article, I’d be doing you a disservice if I didn’t tell you about the great customer service The Restorer team provides. When you invest in their tool, you also invest in their team. You can contact them by email, online chat, phone, or through social media. Every time I’ve had a question, they’ve replied quickly with great advice. When I did have one random wire brush drum that broke, they immediately sent me a new one. What’s more, every time we give them a shout-out on social media, they share our work and encourage us. The Restorer team goes above and beyond to make you feel confident with your investment.
How to Finish Live Edge Wood | The Final Word

So, if you want to process beautiful live edges in a way that’s fast, efficient, and easy on your body, I would 100% recommend—no—urge you to pick up a Restorer for yourself/your business today. If all of the possible accessories intimidate you, just start with The Restorer and the 80 grit nylon drum, which is what I use most of the time. You won’t be sorry that you did.
Written by Mark Cunzolo Owner of Siroh & Ivy sirohandivy.com @sirohandivy on Instagram and Facebook